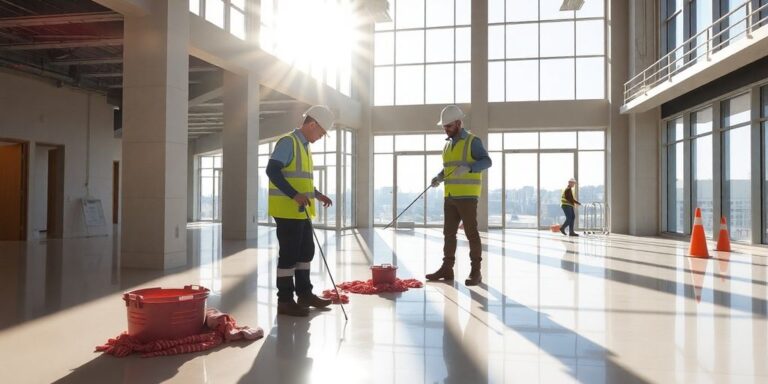
So, you’ve just finished a big construction project. That’s great! But now comes the not-so-fun part: cleaning up all the dust, debris, and general mess left behind. It’s easy to make mistakes during this process, especially if you’re not used to it. We’re going to look at some common blunders people make during post-construction cleaning so you can avoid them and get your space looking perfect.
Key Takeaways
- Don’t rush the post-construction cleaning; take your time to do it right.
- Focus on thoroughly removing all construction dust, as it’s everywhere.
- Always clean from top to bottom to avoid re-cleaning areas.
- Use the correct cleaning products and equipment for different surfaces.
- Don’t skip the final walk-through to catch any missed spots.
Understanding the Scope of Post-Construction Cleaning

When a construction project wraps up, there’s a lot more left behind than just a new building. You’ve got dust everywhere, bits of material, and sometimes even sticky stuff from adhesives. Understanding what needs to be cleaned is the first step to getting it right. This isn’t your everyday house cleaning; it’s a whole different ballgame. Think of it as the final polish that makes everything shine and ready for people to move in or use.
What’s Included: Dust, Debris, and More
Post-construction cleaning covers a lot. The main goal is to get rid of all the mess left by the builders. This means:
- Dust and Dirt: Fine particles from drywall, concrete, and general construction work that get on every single surface.
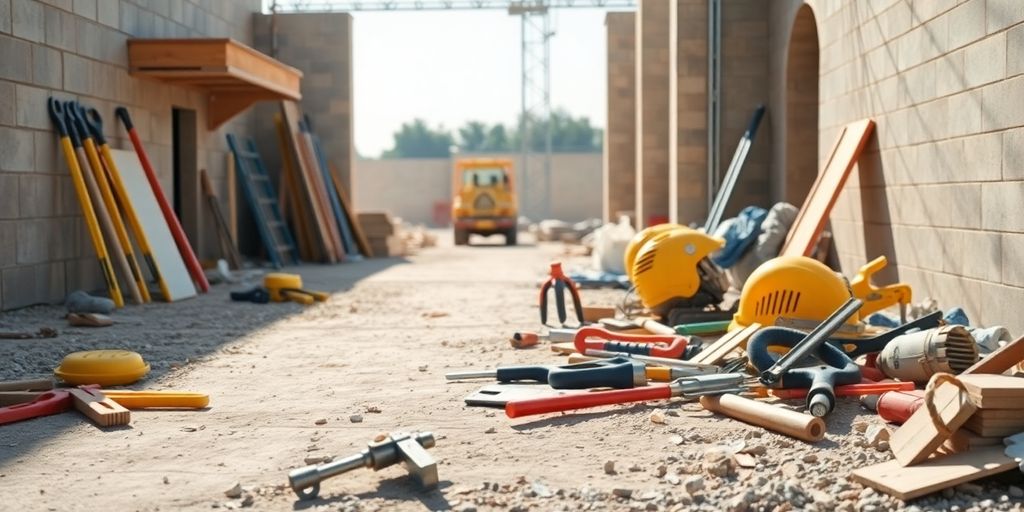
- Construction Waste: Leftover bits of wood, plastic, metal, packaging, and other materials.
- Paint Residue: Splatters, drips, and smudges on floors, windows, and walls.
- Adhesives and Sealants: Sticky residues from tapes, glues, and caulking that can be tough to remove.
- Protective Coverings: Removal of plastic sheeting, paper, and tape used to protect surfaces during construction.
For anyone looking for post construction cleaning calgary services, knowing these details helps you communicate exactly what you need. It’s about making the space safe and looking its best.
What’s Typically NOT Included
While the cleaning crew tackles a lot, there are some things that usually fall outside the scope of standard post-construction cleaning. These often depend on the contract, but generally, you won’t find:
- Removal of large construction debris that should have been cleared by the construction crew.
- Deep cleaning of HVAC systems (this is usually a separate specialized service).
- Washing of exterior windows or surfaces unless specifically agreed upon.
- Moving heavy furniture or equipment that wasn’t part of the construction.
- Disposal of hazardous materials that require special handling permits.
It’s always best to clarify these points upfront, especially when dealing with calgary commercial cleaning companies, to avoid any surprises.
Mistake 1: Rushing the Process
It’s really tempting to want to get into your new space as soon as the last nail is hammered or the final coat of paint is dry. But trying to speed through post-construction cleaning is a recipe for disappointment. Rushing means you’re likely to miss things, and trust me, those little bits of dust and debris have a way of showing up later when you least expect them. It’s like trying to finish a marathon by sprinting the first mile – you’ll burn out and won’t get the result you want.
Impact on Quality and Detail
When you’re in a hurry, details get overlooked. Think about it: are you really going to get down on your hands and knees to wipe down baseboards if you’re trying to finish in an hour? Probably not. This haste means that fine dust, often invisible at first glance, gets left behind in corners, on light fixtures, and inside cabinets. It also means that surfaces might not be cleaned properly, leading to streaks or missed spots. The result is a space that looks clean, but isn’t truly spotless. This lack of thoroughness can really affect the final impression of the construction work itself. It’s better to allocate enough time upfront to do it right the first time.
Mistake 2: Inadequate Dust Removal
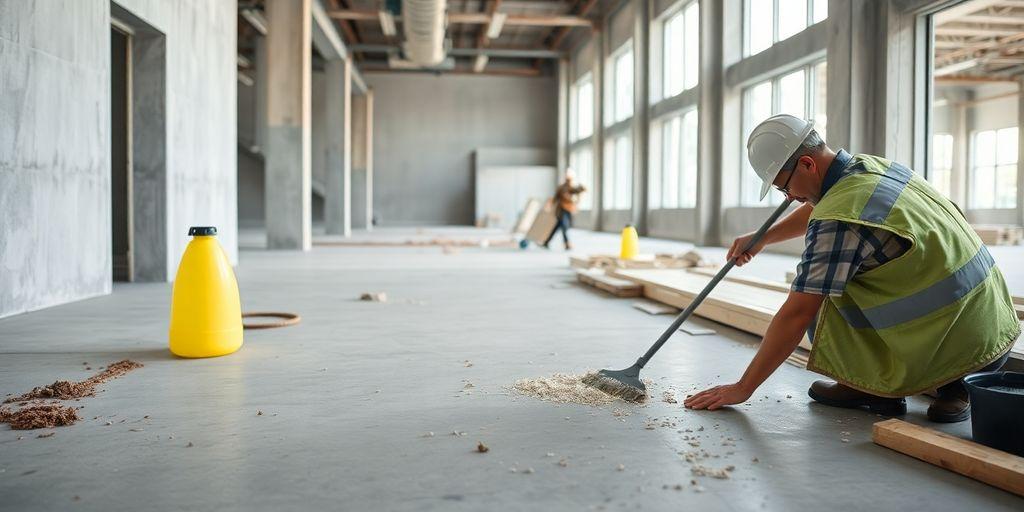
Construction dust is a real pain. It’s not just the big chunks of drywall or sawdust; it’s the super fine particles that get everywhere. Think about it – after all that cutting, sanding, and drilling, there’s a microscopic layer of grime on literally every surface. Failing to tackle this fine dust properly is a major oversight. It’s the kind of dust that settles on your furniture, clings to your walls, and even gets into your HVAC system. If you don’t get it all, it feels like the construction never really ended.
The Pervasive Nature of Construction Dust
This dust is sneaky. It’s not like regular household dust; it’s often made up of silica, wood particles, and other fine materials from the building process. This stuff can linger in the air for a long time, and it gets into every nook and cranny. You might think you’ve wiped down a surface, but a closer look, especially in the sunlight, will show you that fine film is still there. It’s especially bad around areas like baseboards, window sills, and even inside light fixtures. It’s the kind of mess that makes a newly renovated space feel less than fresh.
Proper Techniques for Dust Elimination
So, how do you actually get rid of it? You can’t just do a quick sweep and call it a day. Here are some better ways:
- HEPA Vacuums: These vacuums have special filters that trap even the tiniest particles. Using one on floors, walls, and upholstery makes a big difference.
- Wet Wiping: Dry dusting just moves the dust around. Using damp microfiber cloths is much better because they grab and hold onto the dust. You’ll need to rinse your cloths often.
- HVAC System Check: Don’t forget your air vents and filters. Dust gets sucked into the system and then blown back out. Clean or replace the filters, and consider having the ducts professionally cleaned if possible. This stops the dust from circulating long after the work is done.
Trying to clean up construction dust with just a regular vacuum and a dry cloth is like trying to bail out a sinking boat with a teacup. You need the right tools and a thorough approach to really get the job done right.
Mistake 3: Neglecting High and Low Areas
It’s easy to get caught up in cleaning the big, obvious stuff after construction. You know, floors, walls, windows. But what about the places dust loves to hide? We’re talking about the tops of door frames, ceiling fan blades, the very tops of cabinets, and even the baseboards way down low. These often-forgotten spots can really make a space look unfinished. Construction dust is sneaky; it gets everywhere, and if you’re not actively looking up and down, you’ll miss it. Think about light fixtures, the tops of window casings, or even the undersides of shelves. These areas need just as much attention as the main surfaces. Skipping them means the job isn’t really done, and you’ll probably notice that fine layer of dust settling again pretty quickly.
Here’s a quick rundown of what to pay attention to:
- High Areas: Ceiling corners, tops of cabinets and shelves, light fixtures, ceiling fan blades, tops of door frames and window frames.
- Low Areas: Baseboards, the very bottom edges of walls, floor vents, and the areas behind appliances if they’ve been moved.
- Intricate Details: Built-in shelving, decorative trim, and any other nooks or crannies where dust can collect.
Seriously, don’t just skim over these areas. A quick wipe with a damp cloth on a ladder for the high spots, and a good sweep or vacuum for the low spots, makes a huge difference. It’s the little things that make the final clean look truly professional.
Mistake 4: Using the Wrong Cleaning Products or Equipment
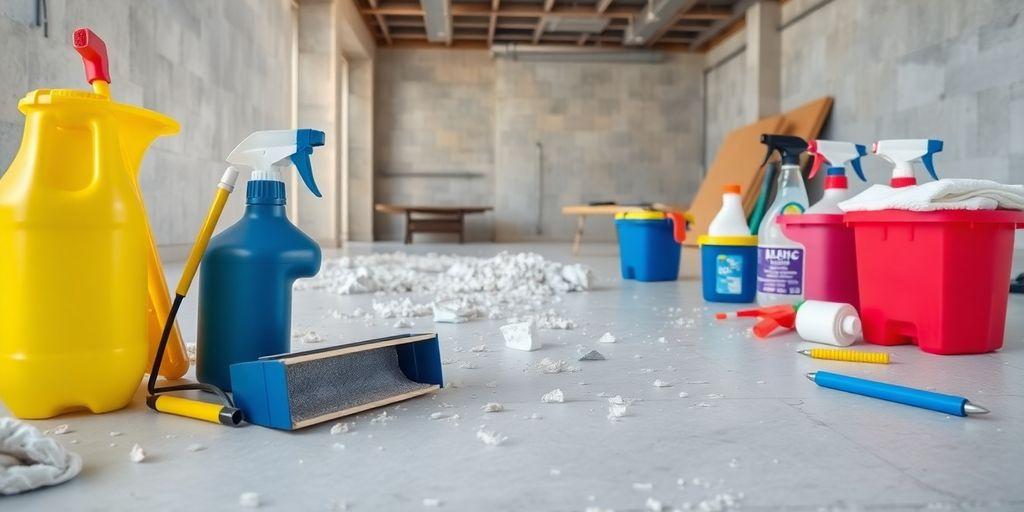
Using the Wrong Cleaning Products or Equipment
This is a big one, and honestly, it’s super easy to mess up. You’ve just finished a big renovation, and you’re eager to get everything sparkling. So, you grab your usual all-purpose cleaner and a sponge, right? Well, hold on a second. Construction dust and debris are different from everyday grime. Using the wrong stuff can actually cause more problems than it solves. Think scratches, streaks, or even damaging new finishes.
Different surfaces need different care. That beautiful new tile floor? It might get ruined by a cleaner meant for glass. Those custom cabinets? A harsh chemical could strip the finish right off. It’s like using a hammer to screw in a lightbulb – it just doesn’t work and can cause damage.
Here’s a quick rundown of common mistakes:
- Abrasive Cleaners on Delicate Surfaces: Stuff like scouring powders or rough pads can leave permanent scratches on countertops, stainless steel appliances, or even new fixtures. You’ll see those marks every time you look at them.
- Acidic Cleaners on the Wrong Materials: Some cleaners have acids that are great for grout but can etch natural stone or certain metals if you’re not careful. It’s a recipe for disaster if you don’t know what you’re cleaning.
- Leaving Residue: Some cleaners just don’t rinse off well. They leave a sticky film that attracts more dust and dirt almost immediately. Your surfaces will look dirty again in no time.
And don’t forget the equipment! A regular vacuum cleaner might not have the power to suck up all that fine dust, and it could even get clogged or damaged. You might need a shop vac for the heavy stuff. Sweeping with a broom? That just kicks dust around, making your job harder. It’s important to use tools and products specifically designed for post-construction cleanup. If you’re unsure, it’s always better to ask or hire professionals who know exactly what to use.
Mistake 5: Not Performing a Final Walk-Through
Skipping the final walkthrough is a pretty big oopsie after all that hard work. It’s like finishing a marathon and then just walking away without checking your time or getting a medal. You’ve put in the hours, dealt with the dust, and made the place shine, but if you don’t do one last sweep, you might miss something. And trust me, you don’t want the client to be the one to find that stray paint splatter or that dusty vent cover. It’s not just about spotting missed spots, though. This final check is your chance to catch any minor damage that might have happened during the cleaning itself, or maybe something that was hidden under all the construction mess. Think of it as your quality control moment. It shows you care about the details and want the place to look absolutely perfect before anyone else sees it.
What to Look For During the Final Walk-Through
When you do that final walk-through, don’t just glance around. Get down low, look up high, and really inspect everything. You’re looking for:
- Any remaining dust or smudges on surfaces, especially windows, mirrors, and light fixtures.
- Scuff marks or fingerprints on doors, walls, and trim.
- Any leftover adhesive residue from stickers or tape.
- Unusual marks or damage on floors, walls, or fixtures that might have been missed.
- Make sure all equipment and supplies have been removed from the site.
This last look is your professional stamp of approval. It’s the moment where you confirm that your team’s efforts have resulted in a truly clean and presentable space, ready for its intended use. Don’t let a simple oversight at the end spoil the whole job.
Addressing Issues Found During the Walk-Through
If you do spot something, don’t panic. That’s exactly why you’re doing this. Make a quick list of what needs a little extra attention. It might be a quick wipe-down of a dusty shelf, buffing out a smudge on a window, or maybe a touch-up on a wall. Having your cleaning supplies handy means you can often fix these minor things right then and there. It’s much better to handle these small corrections yourself than to have them pointed out later. This step shows your commitment to a job well done.
Ensuring a Flawless Finish: Tips for Success
So, you’ve put in the hard work, and the construction is finally done. Now comes the part that really makes a space shine: the post-construction cleanup. It’s not just about making things look tidy; it’s about presenting a space that’s truly ready for its next chapter. Getting this right means paying attention to the little things that can easily get missed when you’re focused on the big picture.
Final Walk-Through Checklist
Before you call it a day, a final walkthrough is a must. Think of it as your last chance to catch anything that might have slipped through the cracks. A good checklist helps keep you on track. Here’s what you should be looking for:
- Dust on surfaces: Check light fixtures, ceiling fans, tops of cabinets, and window sills.
- Smudges and streaks: Look at windows, mirrors, and shiny surfaces.
- Residue: Inspect for paint drips, adhesive marks, or tape remnants on floors, walls, and fixtures.
- Flooring: Make sure baseboards, corners, and edges are free of dust and debris.
- Fixtures and hardware: Check doorknobs, light switches, cabinet handles, and plumbing for cleanliness.
Addressing Lingering Issues
Sometimes, even after a thorough cleaning, you might find a few spots that need a little extra attention. This is where those final touch-ups come in. It might be a stubborn smudge on a window or a bit of dust that settled after the main cleaning. Tackling these small corrections makes a big difference in the overall presentation. Having the right cleaning supplies handy for these last-minute fixes is always a good idea.
Team Collaboration and Client Input
Don’t underestimate the power of a second pair of eyes. Having your team do a walkthrough together can help catch details that one person might miss. Open communication and feedback among the team can also improve your cleaning process for future jobs. If possible, involving the client in the final walkthrough is also a great way to ensure they are happy. It allows for immediate adjustments and builds trust, showing you’re committed to their satisfaction.
The goal of post-construction cleaning isn’t just to remove visible dirt; it’s about creating a healthy, welcoming environment that reflects the quality of the construction itself. Every detail matters in achieving that polished final look.
Want your projects to look amazing? Achieving a perfect final touch is easier than you think! We’ve gathered the best advice to help you get that smooth, professional look every time. Ready to make your work shine? Visit our website today for more expert tips and tricks!
Wrapping Up Your Post-Construction Cleanup
So, we’ve gone over a few common slip-ups people make when cleaning up after construction. It’s easy to get excited about the new space and want to rush through this last step, but taking your time and being smart about it really makes a difference. Remember to plan ahead, use the right stuff for the job, and don’t forget about safety. Doing it right the first time means you can actually enjoy your finished project without worrying about leftover dust or damage. If it all feels like too much, there’s no shame in calling in the pros. A clean finish is the best way to start fresh in your new or renovated space.
Frequently Asked Questions
What happens if I rush the post-construction cleaning?
It’s easy to rush through cleaning after construction, but this often means you miss spots or don’t clean thoroughly. This can lead to a less-than-perfect finish and might even mean you have to clean again later.
Why is dust so hard to get rid of after construction?
Construction dust is super fine and gets everywhere, even in places you wouldn’t expect. You need special tools and methods, like HEPA filter vacuums, to really get rid of it all. Just sweeping or using a regular vacuum usually isn’t enough.
Should I clean from the top down after construction?
Yes, you should always clean from the top down. Start with ceilings and light fixtures, then move to walls, windows, and furniture, and finish with the floors. This way, any dust or dirt that falls down gets cleaned up last, so you don’t have to clean the same spots twice.
What’s the problem with using the wrong cleaning supplies?
Using the wrong cleaners or tools can ruin new surfaces. For example, harsh chemicals might damage new paint or flooring, and rough scrubbers can scratch glass or shiny fixtures. It’s best to use products made for specific surfaces.
Why is a final check important after cleaning?
A final walk-through is super important! It’s your last chance to check everything over and make sure no spots were missed or that nothing got damaged during cleaning. It ensures the whole place looks perfect before you move in or hand it over.
What exactly is post-construction cleaning?
Post-construction cleaning means getting rid of all the leftover dust, dirt, paint splatters, glue residue, and trash from building work. It makes the space ready to use and look its best.
Should I make a cleaning plan after construction?
It’s a good idea to have a plan that lists all the tasks, like removing big debris, then detailed dusting, cleaning windows, and finally cleaning floors. Having a plan helps make sure you don’t miss anything important.
Do I need to wear protective gear during cleaning?
Yes, always wear protective gear like gloves, masks, and safety glasses. Construction sites can have sharp objects, dust, and chemicals that can harm your health. Safety first!